

How to Build Sturdy Shelves | The Art of Manliness


How to Build Sturdy Basement Shelves
by Brett & Kate McKay on June 30, 2009 · 12 comments
Editor’s Note: Every now and then, we feature an excellent blog post that was originally posted in The Art of Manliness Community by a community member. Today we’re featuring an article from one of our most prolific community members, Will. Thanks for the great write up, Will!
If you’re thinking about learning a handy skill, making bookshelves as one of the most practical and satisfying to tackle. Every man has a desire to make some furniture that will be used in his home day after day. And bookshelves are a great introduction to this craft.
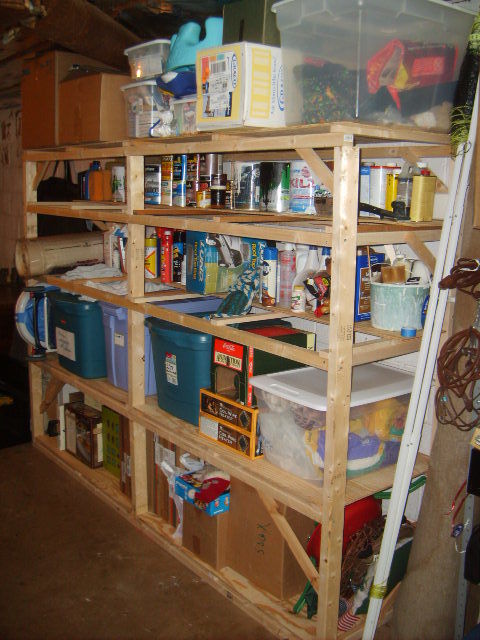
I recently undertook a project to build cheap, sturdy bookshelves that would not fall over, and decided to write-up the results. I am not an expert; don’t sue me if yours do fall over. But I’m not worried about mine. (I did take the precaution of putting very heavy stuff on the bottom shelf. Nothing will save a top-heavy structure from falling over — nothing but an L-bracket, anyway, and I don’t think I need one.)
These instructions show you how to make a 5-shelf set, 8 feet wide and 2 feet deep.
Tools:
- hammer
- power drill, with bits and a Phillips’-head attachment
- Skil saw
- chalk line
- jigsaw (maybe; see below)
- sawhorses, work table, or both
- safety equipment: ear protectors, goggles, etc.
Materials:
- Elmer’s glue
- 3″ wood screws
- 3/4″ wire nails. These are for connecting the plywood shelves to their 1×2 supports. Heavier nails would split the board, and lighter ones wouldn’t connect firmly. I erred too far on the lighter side, and they don’t hold well — but since the weight is on them, it’s not a big issue
- 4-penny, 1 1/2″ nails (I think)
- 8-penny (2 1/2″) nails
Note that the nail and screw sizes aren’t set — I used what I had, mostly. I used 3/4″ wire nails for attaching 1×2′s to plywood, because the bigger ones split the boards. (AoM member David Hawkins suggested smaller ones, and also banging the point of the nail on something hard to blunt it, to reduce this.) 3/4″ was maybe a little too small, because they don’t hold firmly. Still, since the weight pushes the plywood onto the 1×2, it doesn’t matter much.
Wood
I used the cheapest wood they had:
- (4) 4′x4′ plywood, 1/4″ thick. That’s 1 per 2′ shelf. I made two of the shelves only 1′ deep, so together they took only 1 4′x4′ piece between them.
I tried to get unwarped pieces, but that isn’t easy. As it turned out, much of it was very warped. It doesn’t matter if you handle it right (below).
- (6) 8′ 2×3′s. These are the vertical supports.
- (10) 8′ 2×2′s. These are the front and back supports for the five shelves
- …and 3 more 8′ 2×2′s, to make two approximately 2′ connectors between front and back, one at each end.
- (8) 8′ 1×2′s. I put 6 2′ 1×2′s under each shelf (even the ones only 1′ deep) as supports. That makes 30 2′ pieces, or 60′, so that’s (6) 8′ pieces (64″). Better get 2 more to make the diagonals that give the frame rigidity.
…and you will go back to the hardware store. It’s a fact of life! If they take things back no questions asked, like Lowe’s, it’s no problem if you buy too much.
Be sure and measure everything yourself rather than assuming my measurements will work.
(Especially if you’re in a metric world –!) I found that my 2×2′s were actually 1 1/2″ thick, say, and the 1×2′s were 3/4″ thick, but I don’t know if this is guaranteed. (When you start cutting, very little is!)
Planning the shelves
How many do you want, and how tall? I wanted to be sure they’d fit in the door, in case I ever wanted to move them; so they had to be under 82″. I had some plastic baskets and boxes to fit in that were 18″. So I decided on 5 shelves: 18″, 17″, 12″, 10″, and whatever clearance was left for the top shelf. The diagram I drew is below.

Since each shelf is 1″ thick (1/4″ plywood, plus a 1×2 layer underneath that was 3/4″ thick), the heights inside the frame need to be 1″ more than the height you want in the shelves.
Note that although the 2×3′s at the end are whole, the ones in the middle are sawed into smaller lengths that rest on the horizontal 2×2′s. I didn’t want to weaken the horizontal 2×2′s by cutting them, and this method should still supply vertical support in the middle.

Dealing with warp
You can’t expect wood this thickness not to be warped. So I dealt with warped supports as follows:
- I identified the warp by looking along the length of the board. It may be twisted (one end is rotated relative to the other) or it may be bowed (the middle isn’t in a straight line with the ends).
- The more twisted 2×2′s I cut into the small lengths to connect front and back frames. Shorter boards don’t have enough length to be as warped.
- The most bowed I put on the bottom, with the bow facing up, so that the weight on the shelf could force it flat. I figured that the most weight would go on the bottom shelves, so the most warped 2×2′s went on the bottom.
![]()
Similarly, when I built the plywood shelves, I made sure the bow was facing up (if not, I’d have some silly looking shelves), and tried to put the worst ones on the bottom.
My 2×3′s weren’t noticeably warped, but if they had been, I’d have used the worst for the middle support, which is cut into shorter lengths.
Building the front and back frames
I sawed the lengths that you saw in the diagram above. I did find that the shelves tended to be just a little higher than I expected (I probably should have noted that you can’t fit boards perfectly together), so the top shelf was a little under its desired 9″; but that was OK by me. If not, I could have cut the middle supports a little shorter.
To connect the horizontal supports to the vertical end supports, I used 3″ wood screws. (Nails were not sufficient: banging one board in loosened the one I’d just done — and these are the joints that must be strong!) I drilled a hole in the 2×3 straight to where the horizontal 2×2 was going; did this for each joint. Then I put a little Elmer’s glue in the joint and put in the screw using a power drill with a Phillips’-head attachment.
To connect the middle supports, I used nails. The top and bottom supports I put in first — 2 nails per joint, because if it’s only 1, the support can spin on an axis of its 2 nails! For middle joints, half the time the only option was to put the nails in at an angle, as below. Every joint gets glued. (I glued every joint I made in the entire frame, for strength.)

Shelves
Each shelf is actually two halves: the left and the right half. To make it, I just sawed the 4′x4′ plywood right down the middle. To make the 1′ deep shelves, I sawed one of the resulting 2′x4′ pieces lengthwise.
To cut it straight, I used a chalk line.
Here’s a diagram of a 2′-wide half-shelf, as seen from the bottom. I’m showing the right half: the holes cut for the exterior 2×3 supports are on the exterior end (since this is upside down, that’s on the left), and the holes for the middle supports are on the interior end. Since the left and right shelves share a gap
for the middle supports, that gap only needs to be half as wide. The left half-shelf is a mirror image of this one.

The 1×2 supports are one in the middle and one at each end. They don’t need to be flush with the end, but should be close.
Here’s a 1′-deep shelf:

The top shelves are just like the other 2′ shelves, except that I didn’t have to cut out a place for the vertical supports.
Bracing everything

Here’s my front (as seen from the back, so you can see how the diagonal fits onto the horizontal support) and then my back (as seen from the front). The diagonals are not of a particular length; I eyeballed them. They’re about 6″-10″.

Where possible without causing anything to stick out of the frame, I left the diagonal’s end flat and nailed it onto the surface it was to connect to. But often I needed to cut at 45 degrees, as shown. I eyeballed it.
All joints are glued and then nailed with approx 1 1/2″ nails.
Here’s the back. It seemed a little stronger to put the diagonals on the very bottom.

This did lead to a complication, though: the bottom shelves no longer fit into their places! The diagonal was in the way. Also, putting it in place required an even bigger hole than was needed just for the diagonal to fit through. I used a jigsaw to cut the hole as shown. (Remember, this is the right half
of the shelf — the left half would be a mirror image.) The cut needed to be at least 1 1/2″
deep (for the 2×2) + 3/4″ deep (for the diagonal 1×2) = 2 1/4″; so I made it 2 1/2″ deep. (No need to make the shelves fit tight.)

If I hadn’t had a jigsaw, I could have just cut 2 1/2″ off the back
with the Skil saw:

Putting the frames together
When the frames felt sturdy (and they did), I screwed them together with wood screws and 2x2s at each end. Each 2×2 was at the same level as the horizontal 2×2 shelf supports, and was 2′ minus two times the longer width of a 2×3 = 19″ long.
These also were braced by 2 pairs of diagonals, near the top and the bottom, done as before, on the sides.
Finally, the frame got a pair of diagonals flat under the bottom shelf, and another pair under one of the upper shelves, to brace it in the one remaining direction.
Putting it all together
Finally, I moved the frame into place, and set the shelves onto their supports, going bottom to top. They are not nailed on. I don’t think they’re going anywhere.
What I’d do differently
It’s a little wobbly front to back. I probably should have put more diagonal bracing in that direction. I still may.
…and I don’t want to suggest that it all went as smoothly as I presented it. I omitted the false starts to
prevent confusion.
What you can do for me
If you’re inexperienced, and I didn’t explain something, let me know.
If you’re experienced, and there’s something else I should have done, especially for stability, please add a comment!


{ 12 comments… read them below or add one }
- 1FredJune 30, 2009 at 7:45 am
I just built some shelves just like this with my father-in-law a few weeks ago. I didn’t have any set plans ahead of time but they turned out great! One thing that we did different was attaching the selves to a box frame using some screws. Each shelf was attached to a 4 x 8 (out of 2 x 4′s) box with two braces in the middle similar to studs in a wall. Then all we did was use four 2 x 4s for the legs. You can get much better support if you attach the legs to your floor joists. My father in law was standing the bottom shelve as he attached the legs to the joists and there was no problem with supporting his weight. After all is said and done, this thing is solid as a rock
- 2chris wilcoxJune 30, 2009 at 8:51 am
Good reference article!
When we moved into our new home, I built some 2×4 shelves in the unfinished section of our basement. They aren’t as pretty as these, but they’re certainly sturdy.
Since I didn’t have open studs to build on, I drilled 3/8″ holes into the foundation, fixed 2x4s along the back wall with 2 nails through a hole drilled in the 2×4, and attached the whole works to that. : )
- 3AlexJune 30, 2009 at 10:48 am
As far as stability goes, the diagonals are a good start, but you could also reinforce some of the corners with metal angle brackets. These are just pieces of metal about 1/8″ thick bent into a right angle. Don’t let their small thickness fool you, they can be quite strong, especially if you’re just using them to reinforce a structure that is already reasonably solid on its own. They come in other thicknesses, and depending on how strong they are, you may not need wooden diagonals at all. You can find them in some form in most hardware stores.
- 4DaveJune 30, 2009 at 11:17 am
I built some shelving units to about these same dimensions, but I used 1/2″ plywood for the shelves so I wouldn’t need as many supports. I also cut notches in the uprights to support the cross pieces so I had wood supporting the weight on the shelves instead of depending on the shear strength of the screws. The shelves are solid (my kids have climbed all over them), freestanding so I can move them, and there is no need for the diagonals, which block access in this example.
- 5lady brettJune 30, 2009 at 7:08 pm
those look great! i like the lack of clutter the half-shelves give.
with regard to the measurements of the 2x2s, etc., that is perfectly normal. lumber is sold under the dimensions it is originally cut (say 2 inches by 4 inches), but then it is milled so that the finish will be more smooth and the size more uniform, which shears a half-inch off of each dimension (lengthwise). hence the 1 1/2 inch 2x2s. of course, as you say, always measure ’cause that’s just a general case. and some more craft-oriented woods will be exactly the size they say!
also, one thing i’ve found helpful for stabilizing bookshelves is to add a “kickplate". It’s not really something you can add after the fact, but it’s not hard if you plan it in. Simply get a 1×4 the width of your shelves, make the sides extend 3 1/2″ (the height of the 1×4) below the bottom shelf, and screw/nail in the 1×4 in the space below. if you set it back – like, “inside" – about a half-inch it won’t be very visible and will add greater stability. plus, for bookshelves it gives it a somewhat more “finished" look.
i hope that made sense – hard to explain hands-on without visuals!
- 6Rodney HamptonJuly 1, 2009 at 7:32 am
I was just about to take on a project just like this to expand our food storage in the basement. Thanks AofM!
And thanks for the excellent 30 days to a better man series. That was top rate!
- 7Chris HoffmanJuly 1, 2009 at 10:32 am
Well I’ve been there done that.
Not to put a cold wash on the idea but it guesstimates at about $50 just for the 27 support pieces. Then the cost adds up with plywood if you do not keep such things hanging around. Nails and screws. Then there are the men among us who will also get a new tool or two for such a project, God is pleased by a fine working tool, as we all know.
A Gorilla rack at Costco was about $80, takes way less time, and can be easily dissassembled/moved/customized.
Not EVERY thing is about money, a Gorilla rack leaves no sense of accomplishment. But it IS biblical to count the costs. AND I cut my hand the other day taking it apart, leaving a pride-boosting humbling yet manly injury, that I did NOT complain to anyone about. AND my wife hit the thing with the car so a steel support corner got bent. THAT was pretty manly pounding it straight, lots of cool shop sounds, sweat and blood.
A prefabricated steel rack is a lesser thing, but I managed to get some testosterone out of it anyway.
- 8normJuly 2, 2009 at 7:20 am
Why bother?
Just go to IKEA make an inexpensive purchase and spend more time with your family.- 9lady brettJuly 2, 2009 at 10:15 am
but, norm, maybe this is spending more time with your family. take your son and daughter to the shed, shop or basement to help you fashion your own shelves – it’ll be higher quality family time than an outing to buy more stuff.
of course, i’m biased; i practically grew up in my dad’s shop. wouldn’t give that up for the world. and now i can do my own repairs at home – it’s win-win.
- 10WillJuly 2, 2009 at 11:46 am
I should have included my costs. I paid about $70 total, including a tool (the chalk line). I had a few 1×2′s already, and didn’t need to buy the screws; this wouldn’t have been much anyway. The biggest expense was the plywood; it ran me about $40. I got my materials at Lowe’s; YMMV.
I already have something like a Gorilla rack; I like it, but it doesn’t hold nearly as much and it’s not nearly as stable. (Bolting it to the wall would fix the stability, but would be difficult in my basement, which has cinder-block walls.) Pricing Gorilla racks at Amazon, I found that $70 would get me five 30×12 shelves, rather than the five 96×24 shelves I have. Not the best deal! Or there’s the 72×24, three shelves, for $190…not for me either.
- 11Jason CAugust 18, 2009 at 5:07 pm
To increase stability, decrease time and labor, and limit costs, I did the following:
-buy some #8 wood screws in 3″ and 1 1/4″ lengths
-buy 2, 4×8 plywood sheets (5/8″ works well and is most cost-effective for price vs. sturdiness) cut lenghtwise into thirds (each approx 16″ wide) (to save time and ease transport I always had the hardware store cut these for me)
-buy 10, 8′ 2×3′s, and cut 16″ off the top of 8, and cut the last 2 into 16″ lengths
-using 2 of the long 2×3′s, make a ladder-shaped box structure by fitting 5 of the 16″ 2×3 cut-offs in between them like ladder rungs (make sure the top and bottom “rungs" are fastened at the very top and bottom ends of the 2 long 2×3′s) (make 4 “ladder" box structures in total) (the “rungs" determine shelf heights, so use less rungs if you want more space in between shelves, and ensure the rungs are all the same height as each corresponding rung in each “ladder" box) (fasten using 2 of the 3″ screws for each side of each rung, screwing through the side of the upright 2×3′s into the ends of the horizontal 16″ pieces between them)
-now the shelf is ready to be put up – and it is very easy for 1 person, but even easier with 2 – stand the 4 “ladder" boxes up together and slide a plywood strip between them at the bottom and then the third level up – spread the “ladder" boxes apart until there are 2 at each end of the plywood strips, and 2 evenly spaced in the middle
-fasten the plywood down to each rung with the 1 1/4″ screws (2 for each rung)
-slide the other plywood sheets into place on the other shelf levels, and one at the very top (you will have 1 16″ wide plywood sheet leftover (in total I made 3 of these, so this leftover was not wasted) and fasten down just like the othersThese have always been sturdy, and have never tilted sideways. It takes 5-10 minutes to put them up and take them down once the “ladder" boxes are made (in the military I move a lot, so I wanted shelves that could survive multiple set-ups and take-downs). In total, for 1 shelf, the project costs (in Canada):
-plywood and 2×3′s = $40
-screws = $10- 12TonyJune 30, 2010 at 8:01 pm
I made something similar in my basement. They are NOT coming out. Just a two shelf unit to keep suitcases, Christmas and other holiday decorations, etc off the floor.
I used 9 8′ long 2×4′s and two 4×8 pieces of 1/2″ plywood.
Framed up a rectangle of 2×4′s to frame under the sheets of plywood and cut an additional piece for the center.
I saved the longer halves of the 2×4′s cut for the frames to make the vertical supports. What I had left determined the height of the top shelf. I mounted the bottom about 1′ off the ground.
I’ve found I didn’t need diagonal bracing, but then again, my shelves are only about 51″ tall and the 2×4 frame under the shelves provide a pretty rigid structure.
It’s strong enough I can get up on them, and I’m about 240#.
I can build two of these for the same price as some pre-made units.
I could make the movable by using different hardware to assemble them. The wood screws installed with the drill could be replaced with lag bolts, nuts and washers to make this something that could be disassembled.
Leave a Comment
Name *
E-mail *
Website
Previous post: 30 Days to a Better Man Day 30: Get a Straight Razor Shave
Next post: 30 Days to a Better Man Wrap-Up


Source: www.artofmanliness.com